● 구조
-----------------------------------------------------------------------------------------------------------------------------------------------------------------
address_book/
├── app.py
├── templates/
│ └── home.html
│ └── add_contact.html
├── requirements.txt
-----------------------------------------------------------------------------------------------------------------------------------------------------------------
● 파일
(파일) requirements.txt
-----------------------------------------------------------------------------------------------------------------------------------------------------------------
Flask
Flask-SQLAlchemy
-----------------------------------------------------------------------------------------------------------------------------------------------------------------
(실행) # pip3 install -r requirements.txt
※ 필수 패키지 설치하는 파일입니다.
(+) pip3 : python3.x 버전 패키지 관리 도구
(파일) app.py
-----------------------------------------------------------------------------------------------------------------------------------------------------------------
# flask, flask_sqlalchemy 모듈 패키지 불러오기
from flask import Flask, render_template, request, redirect, url_for
# flask_sqlalchemy : 데이터베이스 생성 시 사용
from flask_sqlalchemy import SQLAlchemy
# Flask 애플리케이션 인스턴스(app) 생성
app = Flask(__name__)
# SQLite 데이터베이스(contacts.db)사용 설정
app.config['SQLALCHEMY_DATABASE_URI'] = 'sqlite:///contacts.db'
# SQLAlchemy 이벤트 시스템 비활성화
app.config['SQLALCHEMY_TRACK_MODIFICATIONS'] = False
# SQLAlchemy 인스턴스(db) 생성 및 Flask 애플리케이션 인스턴스 (app) 연결
db = SQLAlchemy(app)
# 데이터베이스 모델(Contact) 정의
class Contact(db.Model):
# 각 컬럼 정의
id = db.Column( db.Integer, primary_key=True)
name = db.Column( db.String(80), nullable=False)
phone = db.Column( db.String(20), nullable=False)
email = db.Column( db.String(120), nullable=False)
# 객체의 문자열 표현 반환
def __repr__(self):
return f'<Contact {self.name}>'
# 데이터베이스 생성 및 초기화
with app.app_context():
db.create_all()
# 라우팅
@app.route('/')
# 특정 경로(ex. /) 진입 시, 불러올 함수(ex. index) 생성 및 지정
def home():
# Contact 모델의 모든 쿼리 조회
contacts = Contact.query.all()
# .html 파일 렌더링
return render_template('home.html', contacts=contacts)
# methods=['GET', 'POST'] : 허용된 HTTP 메소드 지정
@app.route('/add', methods=['GET', 'POST'])
def add_contact():
# POST 받을 시, 아래의 수행
if request.method == 'POST':
# 브라우저로부터 전송된 form의 각 값을 각 변수에 저장
name = request.form['name']
phone = request.form['phone']
email = request.form['email']
# 새로운 값의 데이터베이스 모델(Contact)을 변수에 저장
new_contact = Contact(name=name, phone=phone, email=email)
# 변수를 통해 데이터베이스에 새로운 값 추가
db.session.add(new_contact)
# 영구 저장
db.session.commit()
# index 함수로 리다이렉션
return redirect(url_for('home'))
# POST 받기 전, .html 파일 렌더링
return render_template('add_contact.html')
if __name__ == '__main__':
# 모든 호스트 / 포트 / 디버그 모드 애플리케이션 실행
app.run(host='0.0.0.0', port=5000, debug=True)
-----------------------------------------------------------------------------------------------------------------------------------------------------------------
(+) 디버그 모드 : 코드 변경 시 자동으로 서버 재시작 및 오류 발생 시 디버깅 정보 제공
(파일) home.html
-----------------------------------------------------------------------------------------------------------------------------------------------------------------
<!doctype html>
<html lang="en">
<head>
<meta charset="UTF-8">
<meta name="viewport" content="width=device-width, initial-scale=1.0">
<title>Address Book</title>
</head>
<body>
<h1>Address Book</h1>
<a href="{{ url_for('add_contact') }}">Add New Contact</a>
<ul>
# Jinja2의 for 루프 사용하여 contacts 리스트 순회하며 각 contact 객체 처리
{% for contact in contacts %}
<li>{{ contact.name }} - {{ contact.phone }} - {{ contact.email }}</li>
# Jinja2의 for 루프 끝
{% endfor %}
</ul>
</body>
</html>
-----------------------------------------------------------------------------------------------------------------------------------------------------------------
(파일) add_contact.html
-----------------------------------------------------------------------------------------------------------------------------------------------------------------
<!doctype html>
<html lang="en">
<head>
<meta charset="UTF-8">
<meta name="viewport" content="width=device-width, initial-scale=1.0">
<title>Address Book</title>
</head>
<body>
<h1>Add Contact</h1>
<form action="{{ url_for('add_contact') }}" method="POST">
<label for="name">Name:</label>
<input type="text" id="name" name="name" required><br>
<label for="phone">Phone:</label>
<input type="text" id="phone" name="phone" required><br>
<label for="email">Email:</label>
<input type="email" id="email" name="email" required><br>
<button type="submit">Add</button>
</form>
<a href="{{ url_for('home') }}">Back to Home</a>
</body>
</html>
-----------------------------------------------------------------------------------------------------------------------------------------------------------------
<form> 태그 : 사용자가 입력한 데이터 서버로 전송하기 위한 폼 정의
[참고] Python3 가상 환경 실행
https://uyijune15.tistory.com/223
[정리] Python3 가상 환경
Step1. 가상 환경 생성# python3 -m venv venv Step2. 가상 환경 활성화# (Linux) source venv/bin/activate# (Windows) venv\Scripts\activat Step3. 가상 환경 비활성화# deactivate
uyijune15.tistory.com
● 실행
Step1. 선수 작업 진행
[참고] https://uyijune15.tistory.com/222
[정리] 선수 작업
1) python3 설치# yum install -y python3 2) 최신 패키지 업데이트# yum -y update# pip install --upgrade pip 3) 필요 패키지 설치# yum -y install gcc# pip3 install gunicorn
uyijune15.tistory.com
Step2. 방화벽 설정
# firewalll-cmd --permanent --add-port=5000/tcp
# firewall-cmd --reload
Step3. 작업 디렉토리 이동
# cd address_book
Step4. 필수 패키지 설치
# pip3 install -r requirements.txt
Step5. 실행
# gunicorn -w 4 -b 0.0.0.0:5000 app:app
# python app.py
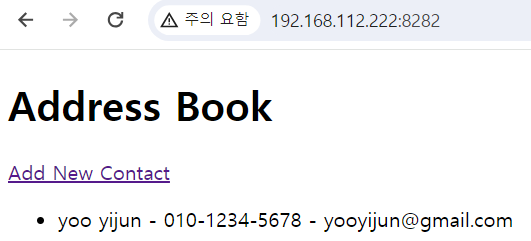
● 테스트
(브라우저) http://<-IP->:<-PORT->

'여러가지 > 테스트' 카테고리의 다른 글
| [참고] sqlite3 데이터베이스 (0) | 2024.06.15 |
|---|---|
| [실습] Address Book - delete 기능 추가 (0) | 2024.06.15 |
| [참고] HTTP 메소드 (0) | 2024.06.15 |
| [참고] Python3 가상 환경 (0) | 2024.06.15 |
| [참고] 선수 작업 (0) | 2024.06.15 |

